The awesome chandeliers I ordered from Urban Outfitters for my bedroom came in on Friday and I was so excited to hang them, it was the first thing I did yesterday. They are bigger than I though and wanted but they still look good!

But as I was sitting there observing the room, I knew this room was in desperate need of a pattern. Since I haven't been able to find a fabric I like as much as my inspiration fabric... And the fabric I ordered from www.spoonflower.com hasn't come in yet, and I don't think I would want a whole lot of that fabric in the room... I made the decision to do something insane.
I got this idea from a friend of mine, Kim, she did this in her hall and it looks amazing! Kim, got the idea from the Jones Design Company blog (which has the stencil I used). Tank you Kim, I am so glad I did this!
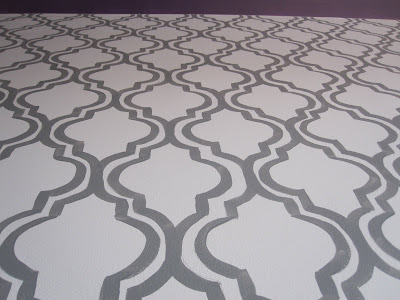
I will say that mine turned out a bit more "organic" than the other two did, but it is that "organic-ness" that is just what was needed in that room... There were so many solid colors and sharp clean lines...It needed something different. So, here we go!
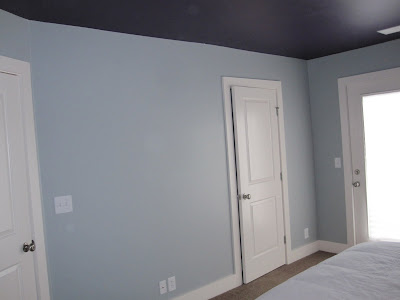
This is the before:

And....after:

Each of these blogs have tips as to how to do this...So here are mine and the supplies that you will need:

- Stencil, From Jones Design Company blog - I used two a paper one for corners and those tricky spots, and a cardboard one for the rest of the wall...
- Level - When I was traceing the pattern onto the wall, I started from the bottom and moved my way up and to the right... So I used the level on the first couple of rows on the bottom and the first two columns on the left. I figured if I make sure the those are straight and level I can work from there.
- Pencil - to trace... make sure you have a good eraser.
- iPod - not pictured but was necessary
- Paint Brush - I think the brush I used was wider than the other two examples... but I was happy with the way that it turned out so I am happy.
- Paint - The best part of this is that I had everything I needed here at home... I just used left over paint from when I painted my accent walls downstairs... It worked perfect!
- Beer - I can be a bit OCD sometimes and want to make everything perfect and often get irritated when it isn't. It usually bothers me, but with this I had to think that the imperfections were part of design...they make it "organic" and beautiful! With a beer in hand I was less concerned about making it perfect, and just had fun with it...
- Time - This took me 8 hours start to finish...That includes cutting out the pattern and clean up.

This was not a hard project at all... it just took some time!
E
4 comments:
I love it Emily!! And if I got up close, you will definitely see my "organic-ness". It's far from perfect but luckily that pattern forgives very easily! And I think it's perfect for your upscale bedroom!
LOVE IT!
Wow that is awesome. I'm impressed. Looks just like wall paper, but I am sure much easier to change at a later time.
Those chandeliers are awesome too! Nice work.
www.cdycattle.blogspot.com
Thanks guys! It was a really fun project to do!
Post a Comment